A Beginner's Guide to Sewing
- Aug 7, 2025
- 8 min read
Growing up, gaining or losing weight, and shrinking clothing all have one thing in common: your clothes stop fitting.
It can be frustrating to have part of your wardrobe become unwearable because of fluctuations in weight, especially if you liked those clothes or had recently bought them; however, the only viable options are to get rid of them or keep them hidden away until they'll fit again, right?
Wrong, actually! Making minor alterations to clothing—such as making them slightly bigger or smaller in specific areas—can in fact be very easy, especially with a little experience.
If you know the basics of sewing, you can make alterations to your clothing, repair broken seams, sew buttons back on, and even make your own clothes!

But first, you'll need to make sure you know all of the common lingo thrown around about sewing and how to operate a sewing machine, the best friend of many a crafter.
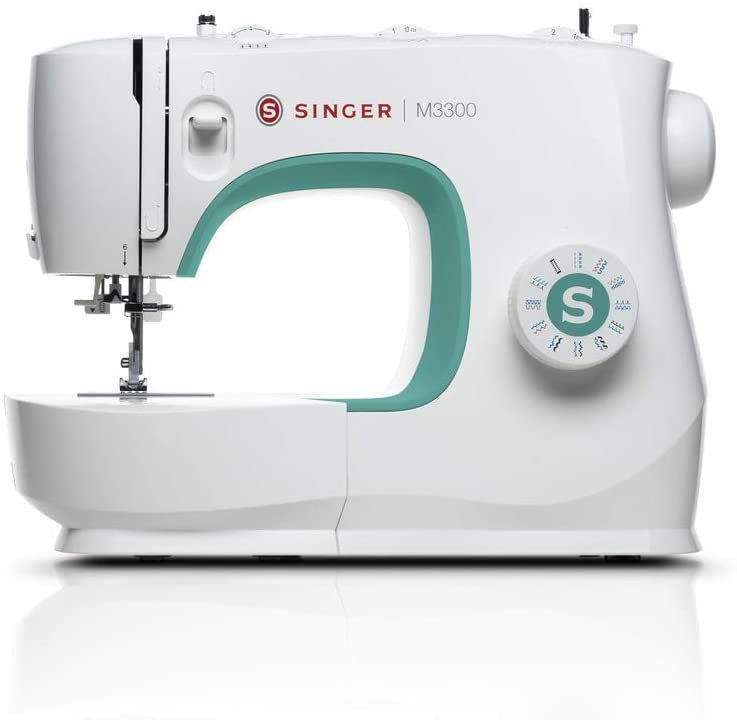
I will be using the Singer M3300 as my example, since that is the sewing machine found in the Main Library here in Union County.
Words used in this article:
Stitch:
A stitch is a single loop or knot of thread used to tie things together.
Top Stitch:
A top stitch is the part of a stitch pulled from the spool of thread and is seen on the outside of a garment.
Bottom Stitch:
A bottom stitch is the part of a stitch pulled from the bobbin and is seen on the inside of a garment.
Stitch Length:
Stitch length is the distance between two spots where a needle pierced the fabric to form a stitch.
Backstitching:
Backstitching is the process of doubling back on a stitch in order to prevent it from fraying, which necessitates going backwards.
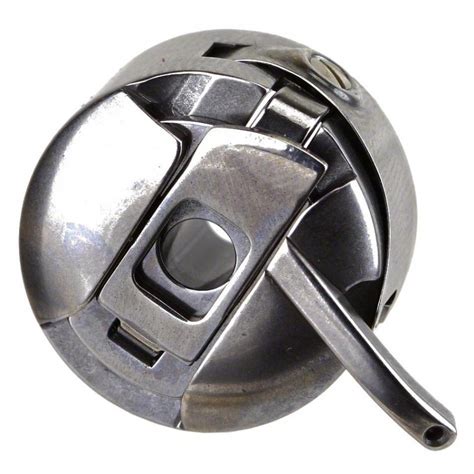
Bobbin:
A bobbin is a small spool of thread used for the bottom stitch on a sewing machine.
Feed Dogs:
Feed dogs are two pieces of metal that work similarly to conveyor belts and "feed" the fabric forward.
Presser Foot:
The presser foot is a piece of metal that prevents the fabric from shifting or billowing by pressing down on it.
Pedal:
A pedal is something you put your foot on the drive a sewing machine. The more weight you put on it, the fast the machine goes.
Hand Wheel:
A hand wheel is something that allows the sewing machine to move manually, making the pedal unnecessary. It can be used for minor movements, or to ensure the needle is at a specific point in it's path.
Sewing Machines

Now, sewing machines were terrifying for me when I first started sewing, so if you're a little intimidated by all of the moving parts and stabby bits, that's perfectly normal!
In order to operate a sewing machine, you need to:
thread the machine and bobbin,
make adjustments to how the machine sews,
put the fabric under the needle, and put the presser foot down.
And really, the last step is incredibly easy.
Step 1
The best way to learn how to thread a machine is to look up a video of it being threaded, such as the one below produced by the Singer Sewing Company channel on YouTube.


One final thing marks the threading process: catching the bobbin thread. This is done to ensure that the bobbin thread doesn't get mixed up in the machine, possible breaking the sewing machine. The video shown below by the Natalie Mootz YouTube channel is a great example.
Step 2
There are typically a few dials on a sewing machine that can change how the stitches work. For example, you generally change the type of stitch, change the length of the stitch, or reverse the direction of the stitching.
Changing the type of stitch can be done to choose either a stitch that will be sturdier for whatever you're working on (such as hems), or to create a decorative addition to parts of a garment (such as hems).
In general, I would stick to a simple straight stitch until becoming more familiar with sewing as a whole. Decorative stitches can be difficult to remove, and more practical stitches can require reinforcing the fabric to be truly useful.

The length of a stitch generally corresponds to how strong it is. The smaller the stitch, the stronger it will be.
The average stitch length is about 2.4 millimeters, which is the default stitch length setting for many sewing machines. That's about 10.5 stitches per inch.
Changing the stitch length isn't actually done by the needle, it's done by the feed dogs—the amount of fabric they move per each stitch changes depending on the stitch length setting.
Reversing the direction of the stitching—also known as backstitching—is required to reinforce any seams you make. Without backstitching, all seams will inevitably fall apart.
Because of this, it's safe to say that every modern sewing machine has a backstitching button or lever—and that many antique sewing machines do as well. You simply need to press the button at the beginning and end of a seam. Make sure that there is fabric for the backstitching to work on. If you start a seam at the very edge of a piece of fabric, and immediately backstitch, the fabric will run right off the sewing machine!
Step 3
The last step involves placing the fabric underneath the needle where you want it to place stitches, then finding a lever (on the Singer M3300 model, it is almost directly behind the needle on the back of the sewing machine, and on other models, you can typically find it somewhere near the back of the machine) that moves the presser foot down onto the fabric. You may have to undo the presser foot a few times in order to make minor adjustments to the placement of the fabric. In order to see exactly where you are sewing, check the hole or large indent in the presser foot—the needle goes there.
Finally, you need to turn the hand wheel found on the right side of your machine towards you—it manually moves the needle up and down—until the needle is at the bottom of its trajectory. Then you can press the foot pedal and start sewing!
There are other things you can do with a sewing machine that aren't necessarily integral to the sewing process itself, such as those listed below.
Making sharp turns while stitching
While making gradual turns is possible by turning the cloth while the machine is running, making sharp turns—such as a 90° turn—requires something completely different. In order to make sharp turns, stop pushing on the pedal just before where you would like to turn. Then, take the hand wheel on the right of the sewing machine and turn it towards you until the needle is at the bottom of its trajectory.
(Tip: if you accidentally overshoot the bottom of the needle’s trajectory, press the backstitching lever/button and continue turning the hand wheel towards you. It'll let you go back to the last point where you could turn.)
While the needle is at its lowest point, lift the presser foot up and turn the fabric, putting the presser foot back down when you have turned enough. The needle will remain stuck in the fabric during this and will prevent it from shifting as you turn.
Practicing
I would recommend not jumping into using a sewing machine fully intending to have something usable by the end of it. Instead, I would try to run an unthreaded machine over something cheap, like these papers, in order to ensure that you know how to run fabric under the machine. It only takes a little practice to ensure you don't break anything!
Clothing Alterations
According to Merriam-Webster, a seam is the place where two pieces of clothing are joined, generally by being sewn together.
A seam is also the place with the most potential for alterations.
In general, it is much easier to make clothing smaller rather than larger because you don't need to get new fabric to add to the size of clothing. This means that if you decide to actively alter your clothing, it would be a good habit to try to purchase any clothing a size or two above your actual size. Then, if you ever need to expand any of these clothes, the extra fabric will already be there!
There are three major types of alterations: taking in, letting out, and hemming.
Taking In
Taking in involves creating a new seam around the area of an old one, for the purpose of making a garment smaller. Taking in a garment does not require removing the old seam, though if you have to take in too much fabric, you may have to cut some of it off to prevent it from clogging up the inside of the piece of clothing.
Taking in clothing is a bit more complicated of a process, so a video demonstration from the YouTube channel The Daily Sew will be used.
Letting out
Letting out clothing is the most complicated, as it involves getting more cloth to fill in the gaps left behind by making a garment bigger.
Of course, if a piece of clothing has previously been taken in, there is often extra fabric inside the clothing already to use for minor alterations, which can be handy.
Remove the seam about 2–4 inches down from the top of the waist, using something like a seam ripper.
Fold whatever additional fabric you bought in half (to account for the other side of the garment). Then, place it underneath the clothing (if the garment is right-side-out). Mark on the additional fabric where it is revealed in the gap, then do so for the other side of the piece of clothing.
Next, cut out whatever fabric hasn't been outlined, leaving a small margin of about a half inch. Using the lines on the additional fabric, line it up with the gap left in the garment, then pin it into place.
(Tip: when pinning clothing, place the pins perpendicularly to the eventual seam, as if the fabric were a 2D plane.)
Try on the clothing to make sure it fits correctly with the pinned fabric in place. If it doesn't, continue to adjust until it does.
When the clothing fits, stitch it together either by hand or with a sewing machine. (A "zigzag stitch", or the stitch resembling many W's works well here.)
Hemming
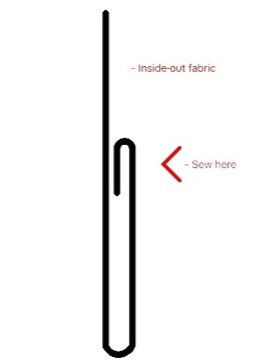
Hemming involves folding in the end of a garment in order to make it seem shorter. This is typically done on things like clothing which would be affected by height, such as pants, skirts, or shirts.
Hemming is best done by wearing the article of clothing inside out, and having a friend fold the fabric up until it reaches the desired height, then pinning it. After ensuring that the amount being hemmed is same throughout, fold the fabric inwards by about half an inch to hide the raw edges of the cloth, then sew all three layers of fabric together. If you're hemming two inches off a pair of pants, there shouldn't be a part where only one and a half inches are being hemmed.
Sewing projects require many different materials—fabric, threads, needles, fabric markers, seam rippers, fabric scissors, interfacing, needles, a pin cushion—the list is endless.
However, these aren't just materials you can buy at your every day supermarket. You need specific fabric or crafting stores, which are becoming rarer after the bankruptcy of one popular chain, Jo-Ann.
Some good local fabric stores are the Salvage Shop, a shop found in Monroe, Union County, or BGM, a knitting machinery store. There is also a Hobby Lobby, a popular arts & crafts brand, found just over the border of Union County in Matthews.
For additional sources to help with any sewing endeavors, check out these books from Union County Library: "Modern mending : how to minimize waste and maximize style", "The complete manual of sewing : 120 visual lessons for beginners", or "How to sew : techniques and projects for the complete beginner".
Remember: every sewing machine or piece of clothing works on different rules, and you may have to look up tutorials online for each different sewing machine or category of clothing in order to understand them fully.
Sources:


