A Beginner's Guide To Animation
What is animation?
If you've watched any animated films, such as cartoons or anime like "Inside Out" or "One Piece," you're probably familiar with the word animation. Animation is one of the biggest parts of the entertainment industry, especially at major studios like Disney and Pixar. If you've watched any of these animated movies, you've probably wondered, "How did they do that"? Well, the textbook definition of animation is simple. Animated movies are created through the illusion of movement by rapidly piecing together frames (still images/ drawings/3d models), one after another. However, there is much more to this than simply putting frames together. That's why the first step to learning animation is mastering the fundamentals, so follow along as we explore a step-by-step guide to creating your very first mini animation project!

Choose your animation style
Before learning an animation, it's first important to choose a style to stick to. Each animation style has its own levels of difficulty, tools to use, and techniques. Understanding which style is the best fit for you is crucial to a smooth learning process. Here are some of the most common animation styles:
2D Animation - (Best for beginners) Drawing movements on 2-dimensional surfaces like paper and creating frames one at a time. As a traditional animation style, 2D animation is for you if you are learning animation fundamentals.
Stop Motion - (Beginner-friendly) Stop motion is created by manipulating real-life objects while taking pictures of each movement. If you're not familiar with drawing, stop motion is another beginner-friendly option.
3D Animation - (Advanced Learners) In contrast to 2D animation, 3D animation uses digital models rather than drawings for each frame. This style is usually more complex, as learners will need to become familiar with rigging models and 3D software before animating.
Animation Principles

Disney’s 1937 Snow White
While it's not necessary to dive into the complex physics of animation as a beginner, it's a good practice to be familiar with the 12 principles of animation, written by Disney animators Frank Thomas and Ollie Johnson.
Squash and Stretch - Add weight and flexibility.
Anticipation - Preparing the viewer for motion (Ex. pulling the arm back before throwing a ball)
Staging - Determining the focus of each scene through lighting, framing, etc.
Straight Ahead Action and Pose to Pose - Two techniques of either creating frames from start to end or working with segments.
Follow-Through and Overlapping Action - Add small movements even when the main action ends.
Ease In, Ease Out - Movement should start and end gradually.
Arcs - Move objects in an arc for natural movement.
Secondary Action - Add supporting movements to enhance the main focus.
Timing - Control how many frames each action takes intentionally.
Exaggeration - Exaggerate while animating motion.
Solid Drawing - Pay attention to the volume, weight, and balance of the objects you draw.
Appeal - Make sure that your project is interesting to the audience.
Software / Tools
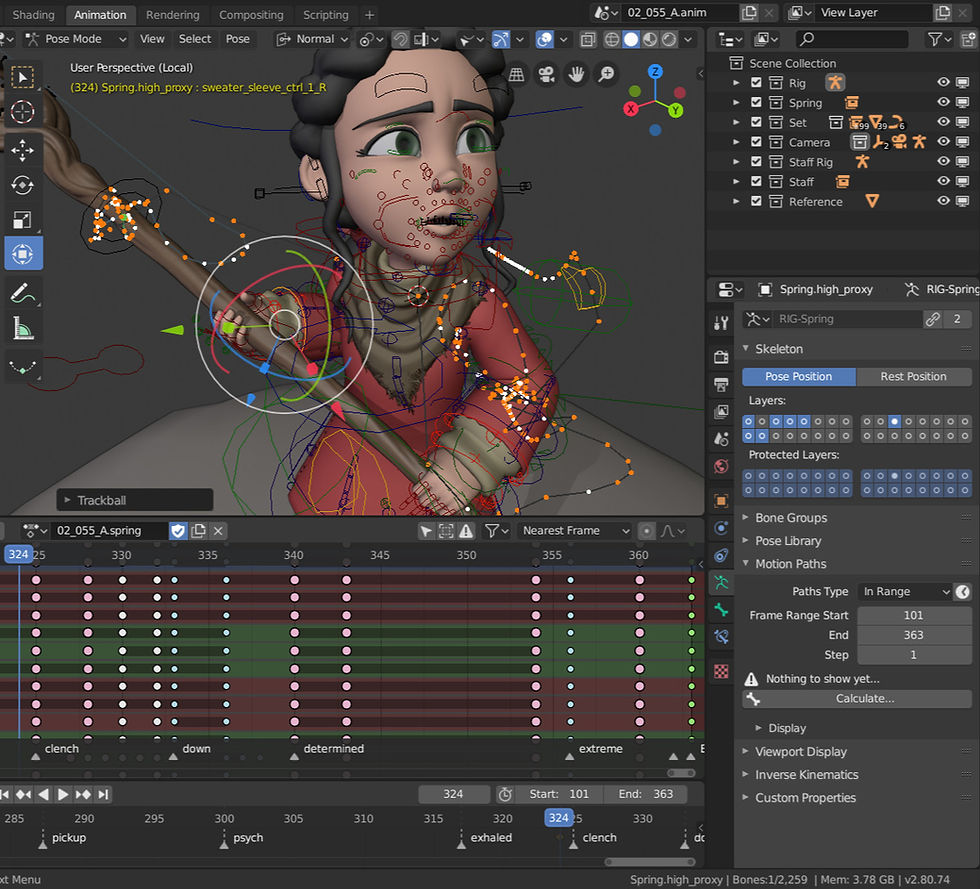
If you are just starting with animation, don't worry too much about the software you're using. You don't need to begin with expensive or highly professional applications like Adobe. Choose a program based on what you are comfortable learning with and your workspace. Here are some well-known free/low cost yet high-quality programs based on different devices:
PC: Krita, Pencil2D, Blender (3D), OpenToonz,
Mobile: FlipaClip, Alight Motion, CapCut, Procreate Dreams (Paid)
Create a Mini Project
The best way to improve your animation skills is by creating something yourself, and, of course, to get started, the most widely shared animation exercise is the bouncing ball. This project teaches many animation fundamentals, including squash and stretch, timing, and spacing.

Begin by drawing the ball near the top of the page where the animation will begin. This will be the first frame.
Then, using the photo above as a reference, draw each frame based on the balls as numbered to create the bouncing action.
You may notice that at numbers 6 and 13, where the ball reaches the ground, the ball stretches with impact on the ground. Same with numbers 5 and 12, the ball stretches before hitting the ground. This is a perfect example of Squash and Stretch, timing, and spacing all in one.
Now that you've drawn the first bounce, repeat the process as many times as you'd like, but remember, after each bounce, the height of the bounces later on will slowly decrease!
Now that you have a clear understanding of animation principles and have created your first project, you're one step closer to becoming a skilled animator! To further improve your skills, try creating new projects with new objects, backgrounds, or even adding in a character or two. Remember, every experienced animator starts with a blank project, so keep creating, exploring, and most importantly, have fun!
Sources:


